Troubleshoot From Afar
Productivity doesn't have to come to a
screeching halt when a remote employee can't fix a PC-related problem himself or
when the on-staff tech support wizard is on the road. Windows Remote Assistance,
Microsoft's built-in Web-based troubleshooting tool, lets one user connect to and
view the Desktop of another user's computer, as well as take control of the
system's mouse and keyboard to change settings, view system parameters,
uninstall and install applications,andattemptrepairs.ThankstoWindowsRemoteAssistance,amajor
roadblock can quickly become a minor detour, no matter where the users are
physically located.
|
Thanks to Windows Remote Assistance, a
major roadblock can quickly become a minor detour, no matter where the users
are physically located.
|
Step1
A Windows Remote Assistance session begins when
the user who needs help initiates contact with a person he or she trusts.(For the
purposes of this article, the target computer refers to the one in need of
troubleshooting and the helper refers to the remote user who will take controlofthePC.)
In order for the target computer's user to get remote assistance, he or she needs
to send the helper an invitation. To do this, open the Start menu, type assistance,
and then press the ENTER key. This launches the Windows Remote Assistance
wizard.
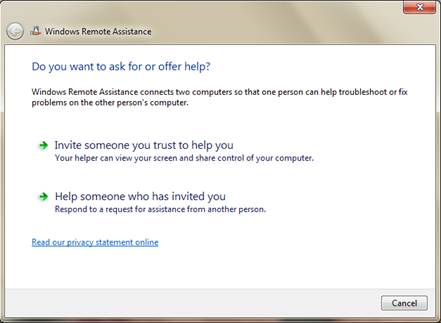
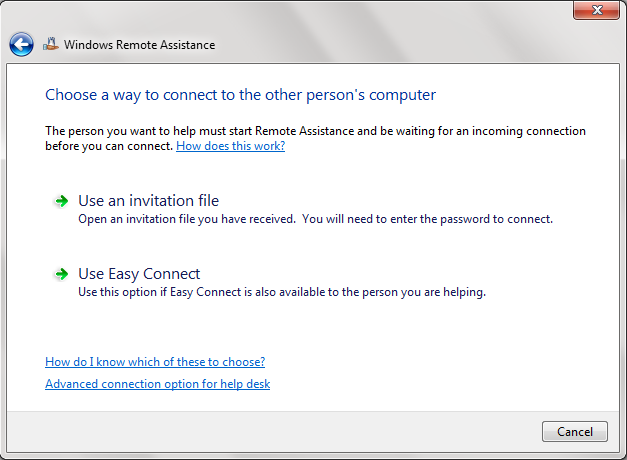
Both the target and helper computer
users will see this when they first launch Windows Remote Assistance.
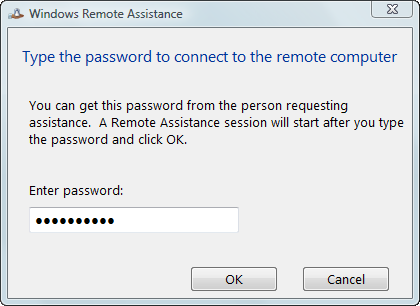
The helper needs to input the
password to proceed.
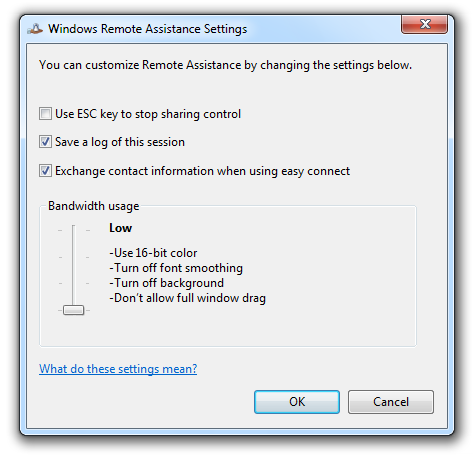
If you experience lag, make sure the
Bandwidth Usage slider is set to Low
Step 2
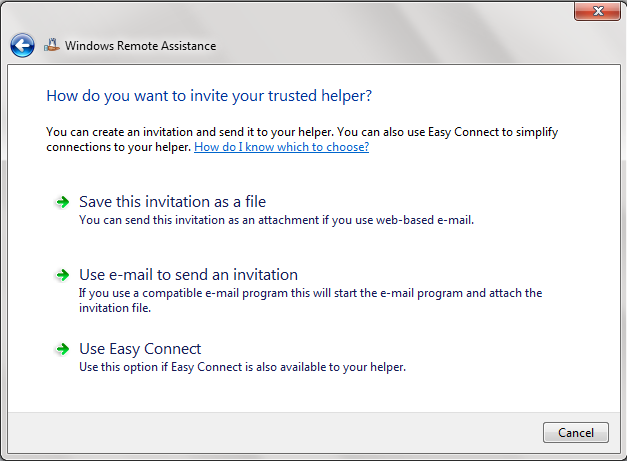
Next, click Invite Someone You Trust to Help
You. Your options are to Save This Invitation As A File(so you can send it as an
attachment using your preferred Web mail provider), Use E-mail To Send An Invitation(which
launches a compatible email application that you currently use, such as Outlook),or
Use Easy Connect. We'll explore Easy Connect later.
The first two options let the target computer
user connect to the remote user in the same way; once you send the email or
save the file, Windows Remote Assistance will display a 12-digitpasswordthatthetargetcomputer
user will need to relay to the remote user.
Step 3
If you are acting as the helper, and you have
received a Remote Assistance invite, then click Help Someone Who Has Invited You.
You can also proceed by simply launching the Remote Assistance invite, which opens
the connection password input dialog box. Next, the helper needs to input the
code and click OK. The user at the target computer will then need to confirm
the connection by clicking Yes when the Would You Like To Allow X To Connect To
Your Computer (where X is the name of the remote user's computer.)
Step 4 (Optional)
Now the helper will see an image of the target
computer's Desktop. Either the helper or the user at the target computer can initiate
a chat session by clicking the Chat button at the top of the Windows Remote Assistance
window. You can also click the Settings button and adjust the Bandwidth Usage slider
to display 32-bit color, enable font smoothing, turn on the background, and allow
full window dragging. But these adjustments are purely aesthetic.
“If you are acting as the helper, and you have
received a RemoteAssistance invite, then click Help Someone Who Has Invited
You. Youcan also proceed by simply launching the Remote Assistance invite,which
opens the connection password input dialog box.”
Steps 5
At this point, the user at the target computer
still has control of the PC, so use this opportunity to demonstrate the problem
for the helper, by re-creating the error or demonstrating the problem.
To gain remote access of the target computer,
the helper needs to click the Request Control button from the top left of the
Windows Remote Assistance window. The target computer user then needs to click
Yes and check the box to enable the remote user to handle User Account Control
prompts. Although both users can input commands, launch applications, move the cursor,
and input keyboard commands, it's best that the user at the target computer leave
the mouse and keyboard alone to let the remote user perform the troubleshooting
tasks.
To interrupt the session at any time, click
the Pause button, out the helper's view and halts his ability to control the
target system. This is ideal for enabling the target computer user to input
passwords or private data. To resume, the target computer's user must click Continue.
To quit the session entirely, either user can click the Stop Sharing button at the
top of the screen.
“To gain remote access of the target
computer, the helper needs to click the Request Control button from the top
left of the Windows Remote Assistance window”
|
Windows Remote Assistance Easy Connect
|
|
This aptly named feature lets users of
two Windows 7 systems initiate a Windows Remote Assistance session without
first exchanging an invitation file. Note that a fast network connection may
also be necessary.
Step1
Start by launching Windows Remote
Assistance and then clicking the Invite
Someone You Trust To Help You button.
Click Use Easy Connect, if available.
Step 2
The helper needs to launch Windows Remote
Assistance, click the Help Someone Who Has Invited You button, click Use Easy
Connect, input the code from the target system, and then click OK. Once the
connection has been established, the Windows Remote Assistance session works
the same as if it had been set up using the email method.
|
The Easy Connect features lets you
skip the email step entirely.
If you don’t meet the minimum
requirements for Easy Connect (both PCs need to be running Win7), you will need
to use the Invitation File method.